The NVR and IP CCTV cameras are set in the IP range of 192.168.1.x where x can be any number between 0 to 255. The default configuration of NVR is 192.168.1.20 while for the camera it is 192.168.1.21. However it may vary for certain manufacturers. The problem arises when your home network is on a different subnet. For example if your home network is on 192.168.2.x you may not be able to access the NVR or cameras from your laptop or phone. You may still be able to access the CCTV footage from a monitor that is directly connected to the NVR. To configure the NVR and CCTV so that it works with your laptop and phone, here is the step by step procedure to change the IP of your NVR and cameras.

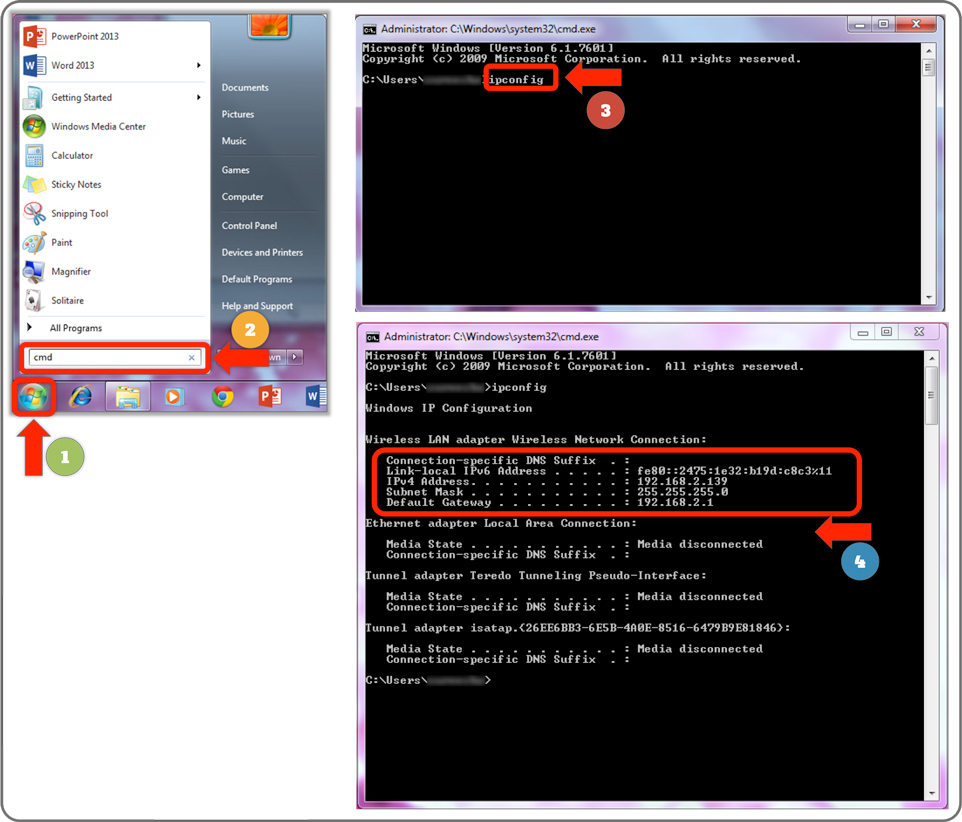
Step 1: Find your Home IP network
Connect your PC to your Home WiFi network and type cmd in the search for programs box. It will open the command shell. Type ipconfig and press enter. This command will show your IP configuration. Note it down somewhere as you may have to change it temporarily to connect to the NVR and back. Let us assume that the pc has an IP address of 192.168.2.5, which means that it is in the subnet of 192.168.2.0. We will have to change the IP address of camera and NVR into the subnet of 192.168.2.0. The default IP address of NVR is 192.168.1.20 and if it is reset to factory defaults, the IP address is 192.168.1.188. The default camera IP addresses are 192.168.1.21, 192.168.1.22 and so on.
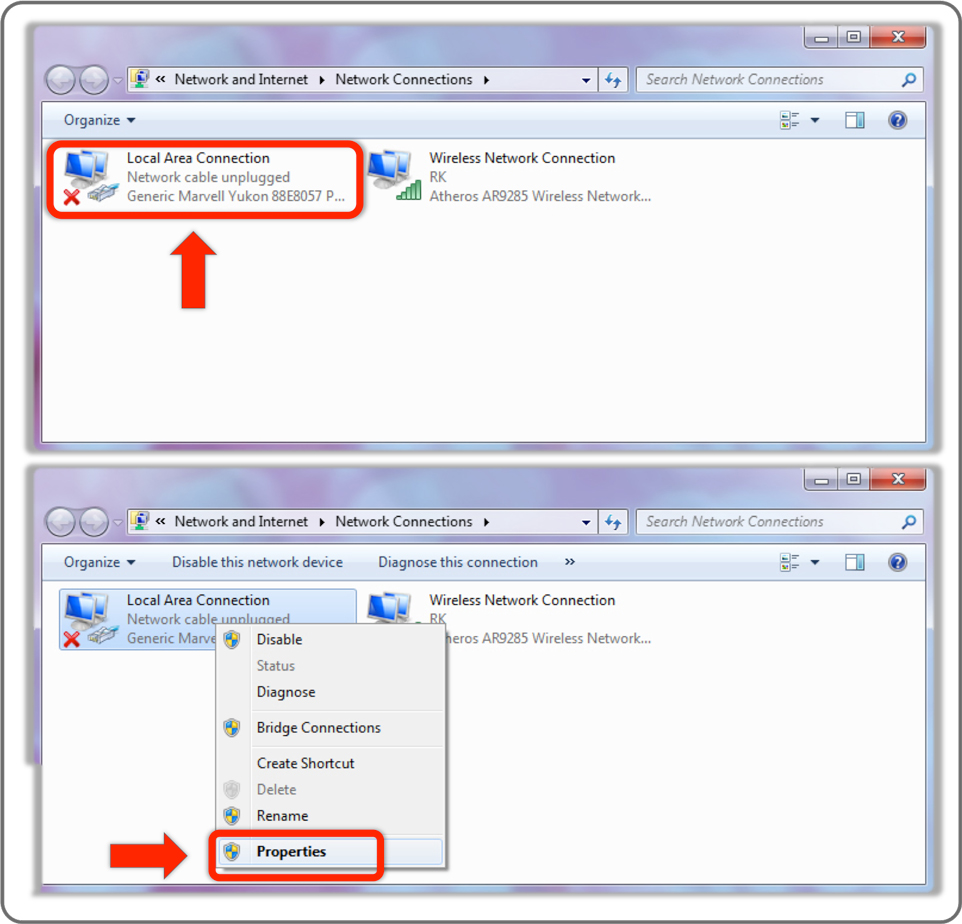
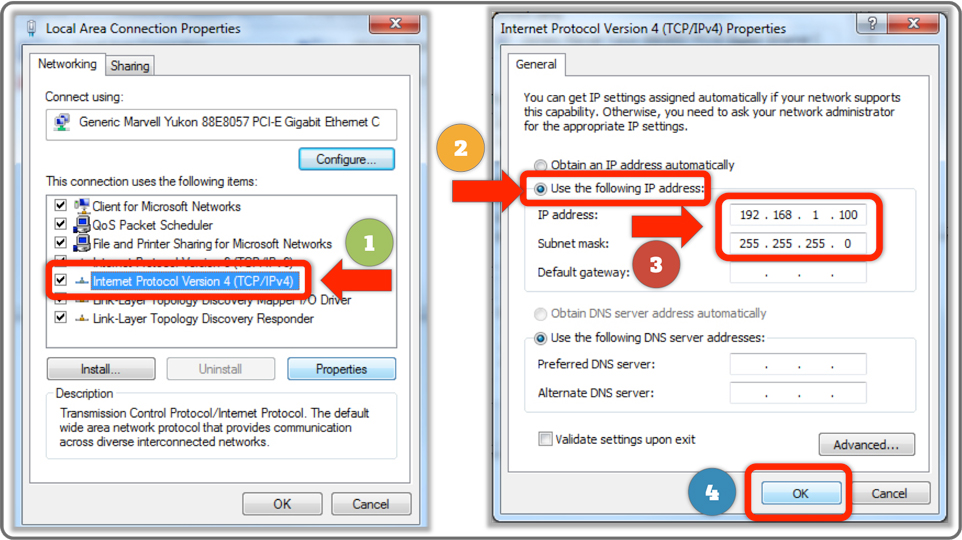
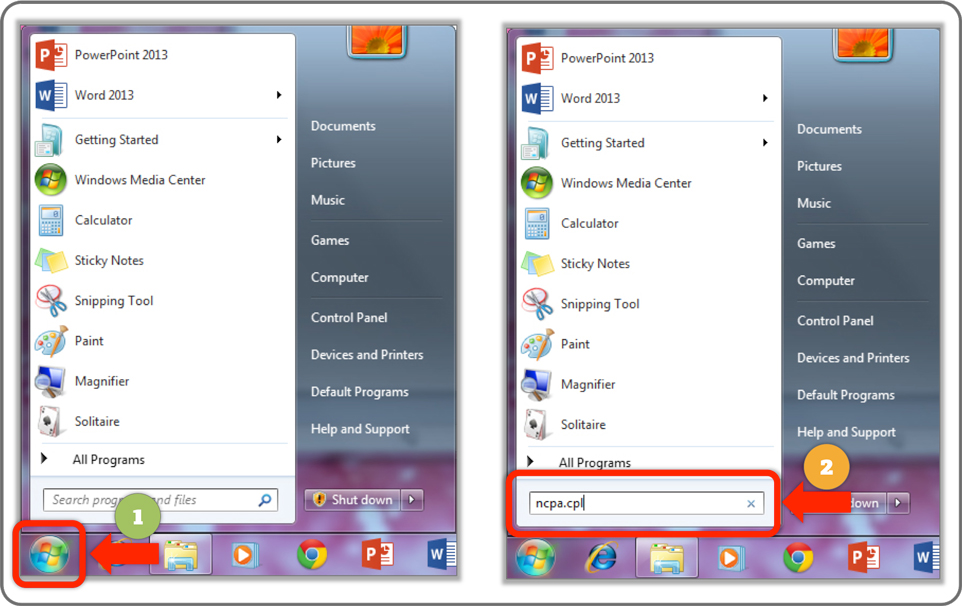
Step 2: Change your Laptop/PC IP address
To access the NVR and cameras and change their IP, the laptop must be in the same subnet as the default NVR and camera IP is in. So open network connections and right click on the local area network. Click on properties and change the IP address to 192.168.1.100 and subnet mask to 255.255.255.0. Leave all other settings as it is and click on OK.

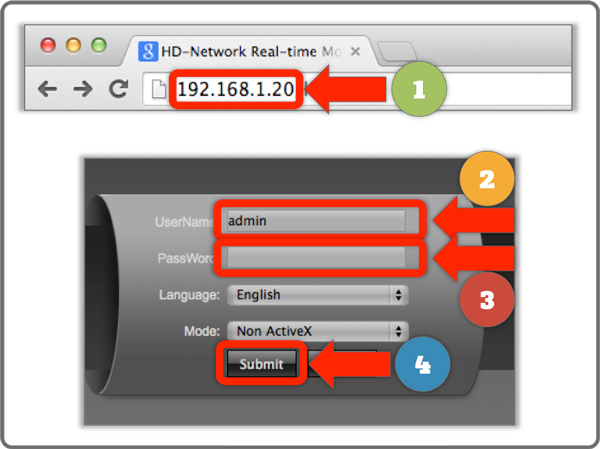
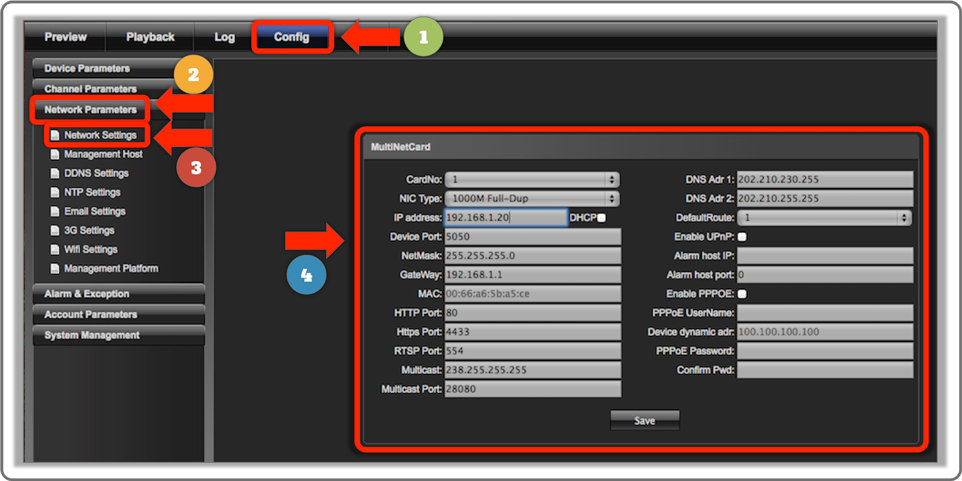
Step 3: Change the NVR IP address
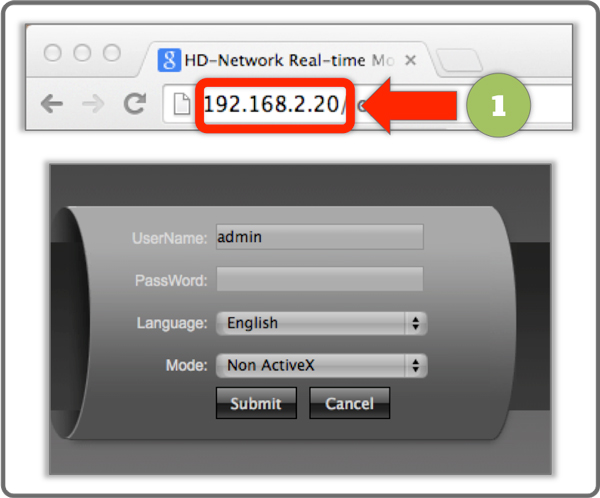
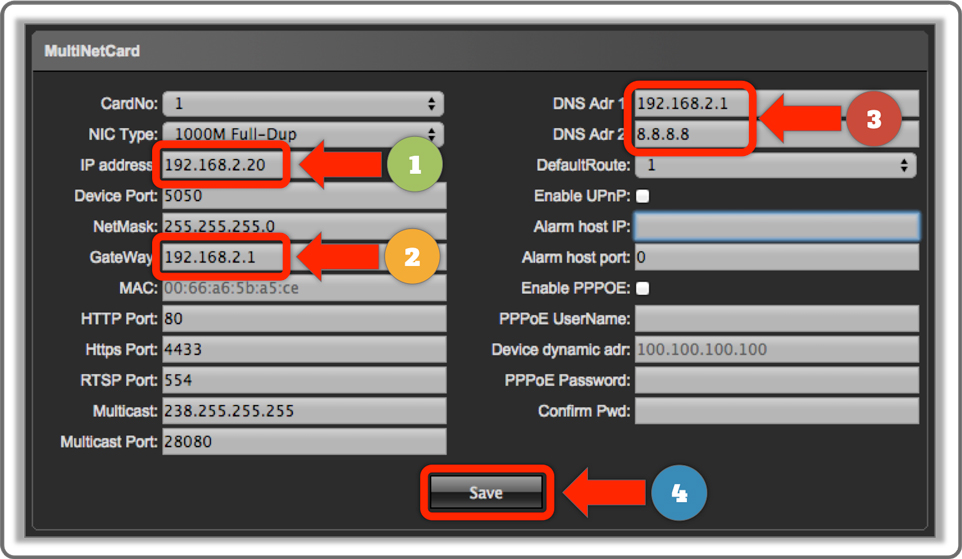
Login to the web gui of NVR by typing the default IP address of the NVR in the address bar of your browser and use the username as admin. By default the password is not set so leave it as blank for now. If you have changed the password then use that password. Go to config → network parameter → network settings and change the IP address to match the home subnet. In our case let the IP be 192.168.2.20. When the IP is changed you will not be able to access the web gui from your browser as it has moved to a different subnet. Move on to the next step.
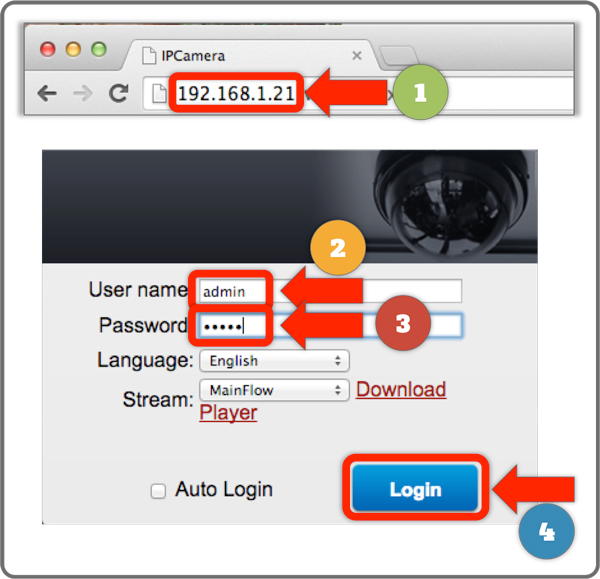
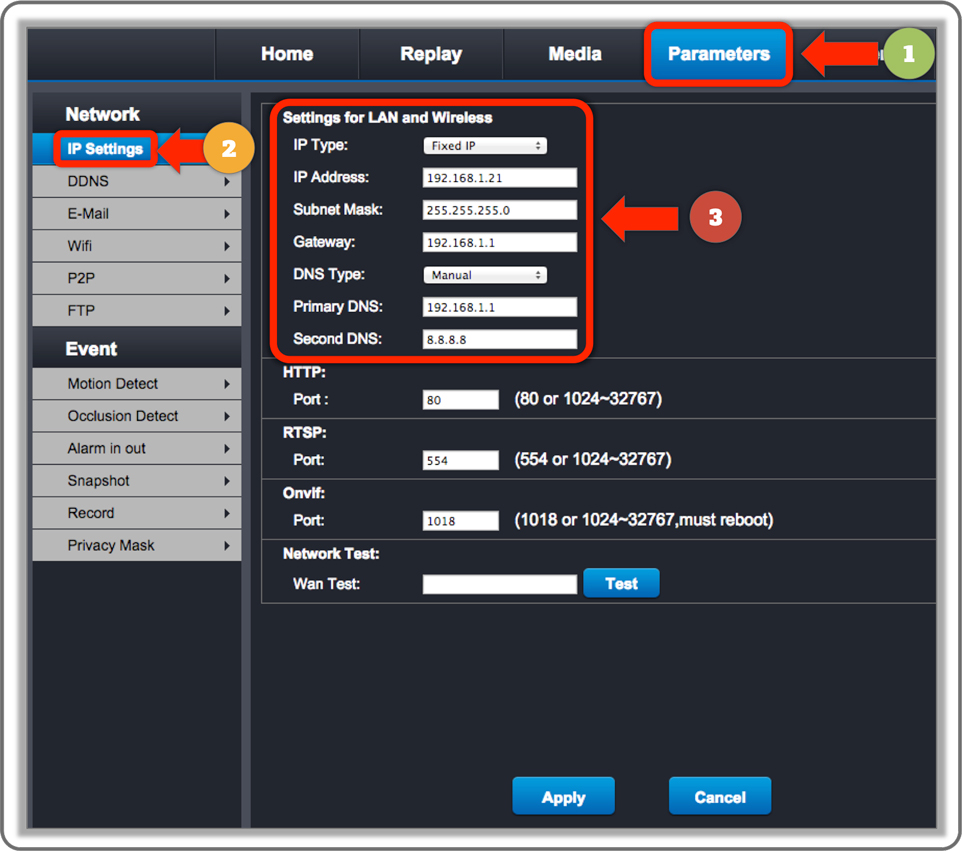
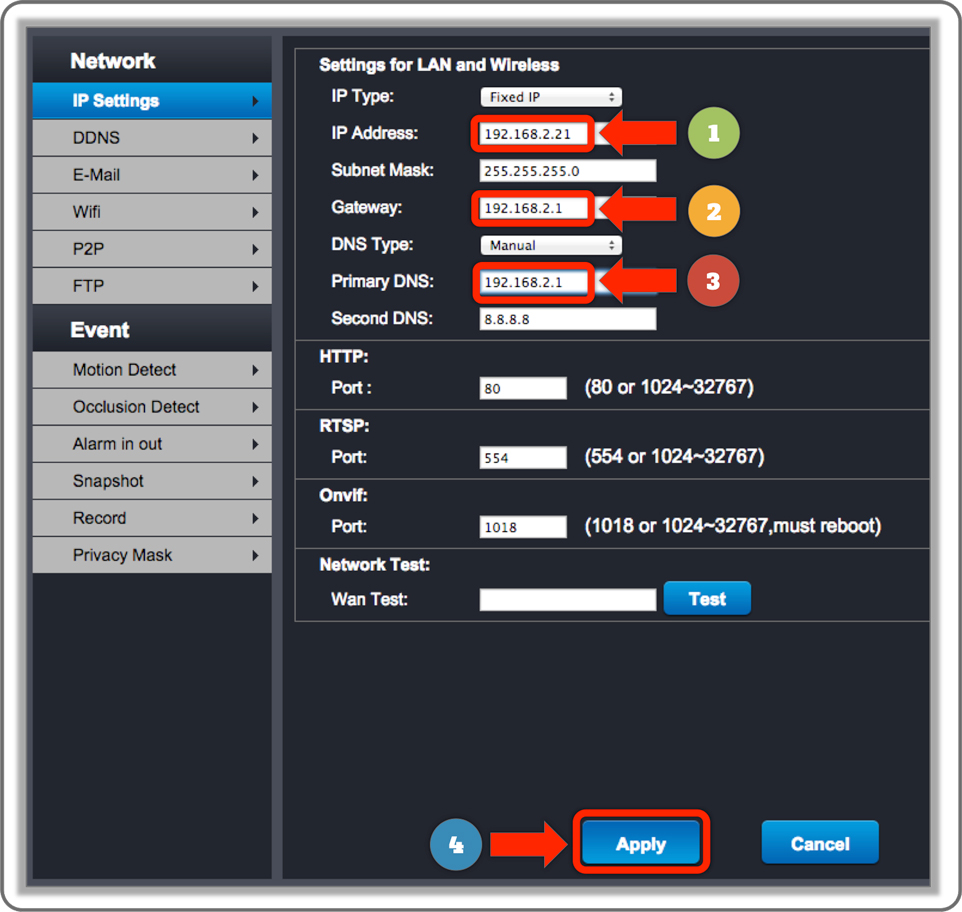
Step 4: Change the camera IP
Enter the web gui of the camera from the browser address as 192.168.1.21 using the default login username admin and password admin. Go to parameters → IP Settings → and change the IP address to 192.168.2.21. For the subsequent cameras change the IP address to 192.168.2.22, 192.168.2.23 and so on. When the IP addresses are changed, as expected you will not be able to view the cameras.
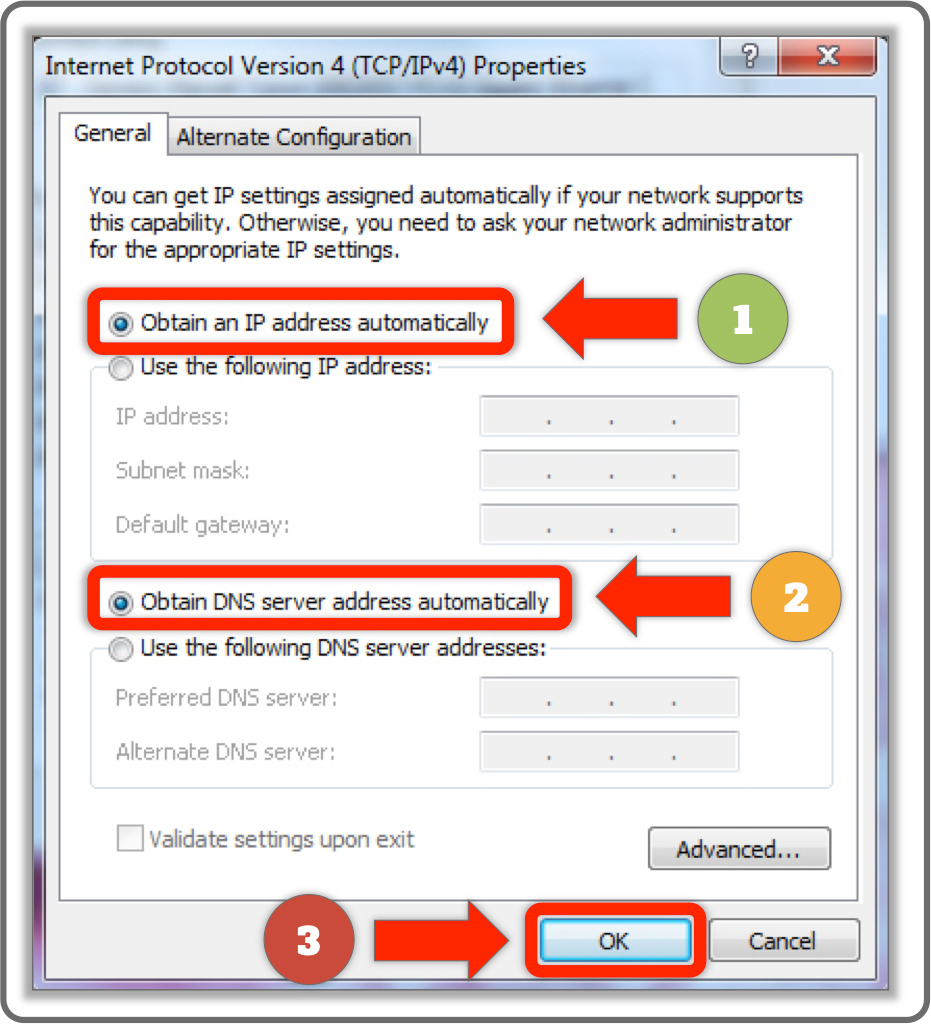
Step 5: Change the IP of the PC back to original
After the IP addresses of the NVR and cameras are changed, it is time to reset the IP address of the PC. As before, go to Network Connections and change the IP address back to 192.168.2.5.
Step 6: Reconfigure the cameras in the NVR
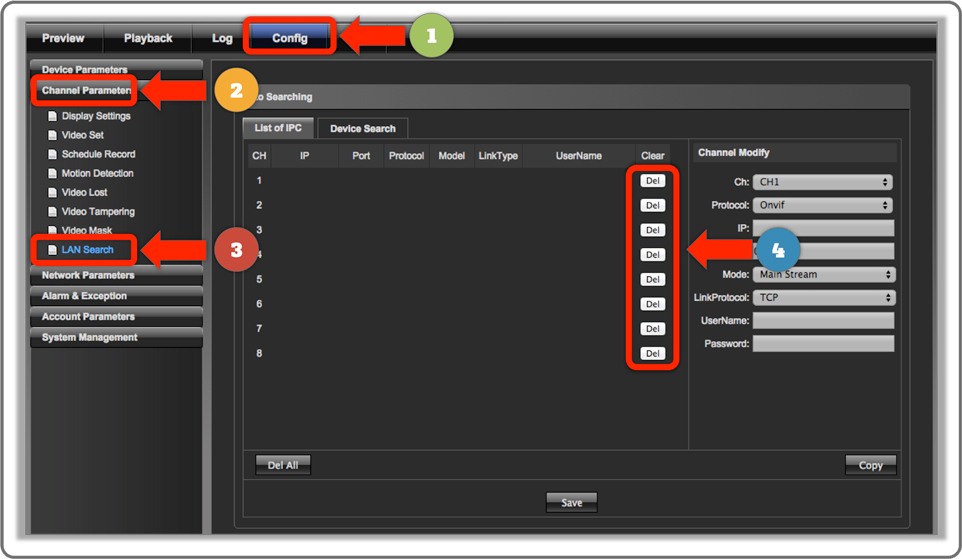
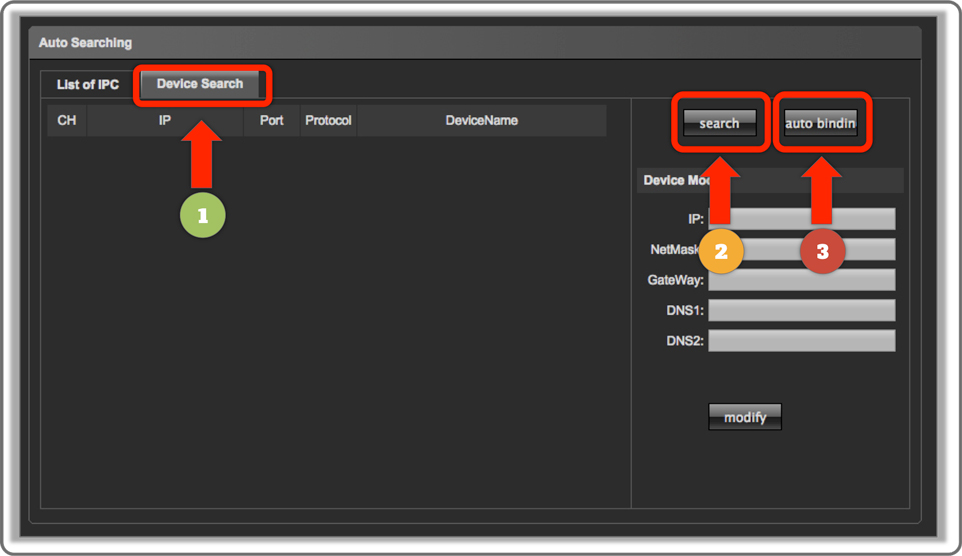
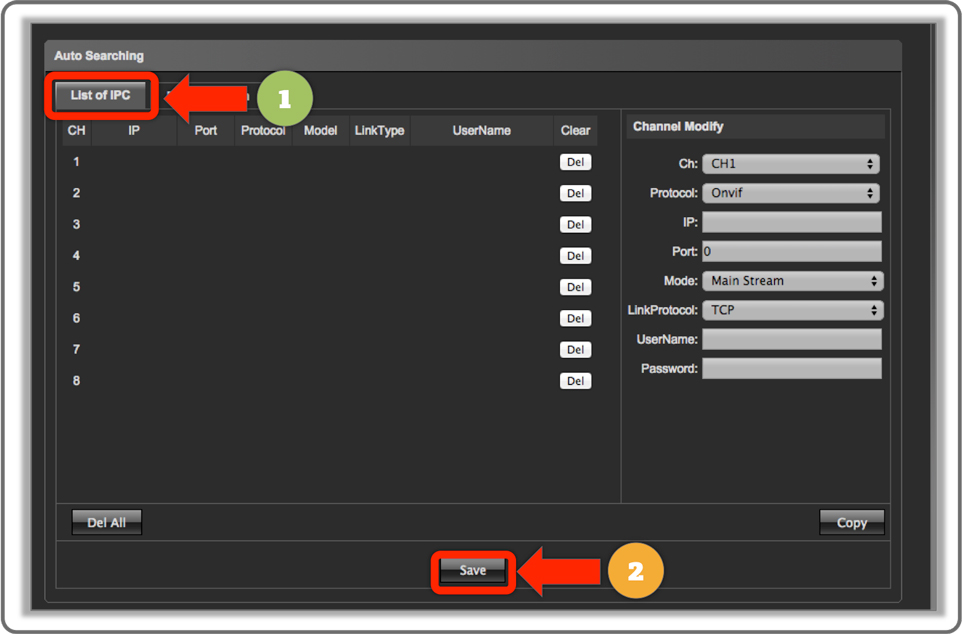
Since you have changed the IP addresses of the cameras, they will no longer be visible through the NVR. To see them you have to reconfigure the cameras. Login to the NVR gui. Go to Config → Channel Settings → LAN Search and delete the existing cameras listed. Now go to Device Search → Search and wait for a few seconds so that the NVR detects all the cameras automatically. After all the cameras has been listed here, click on Auto Binding for binding the cameras to their respective channels. Save the settings in the List of IPC tab and now all cameras would be visible through the NVR as well as your PC.